ACTIVATE THE PLUGIN
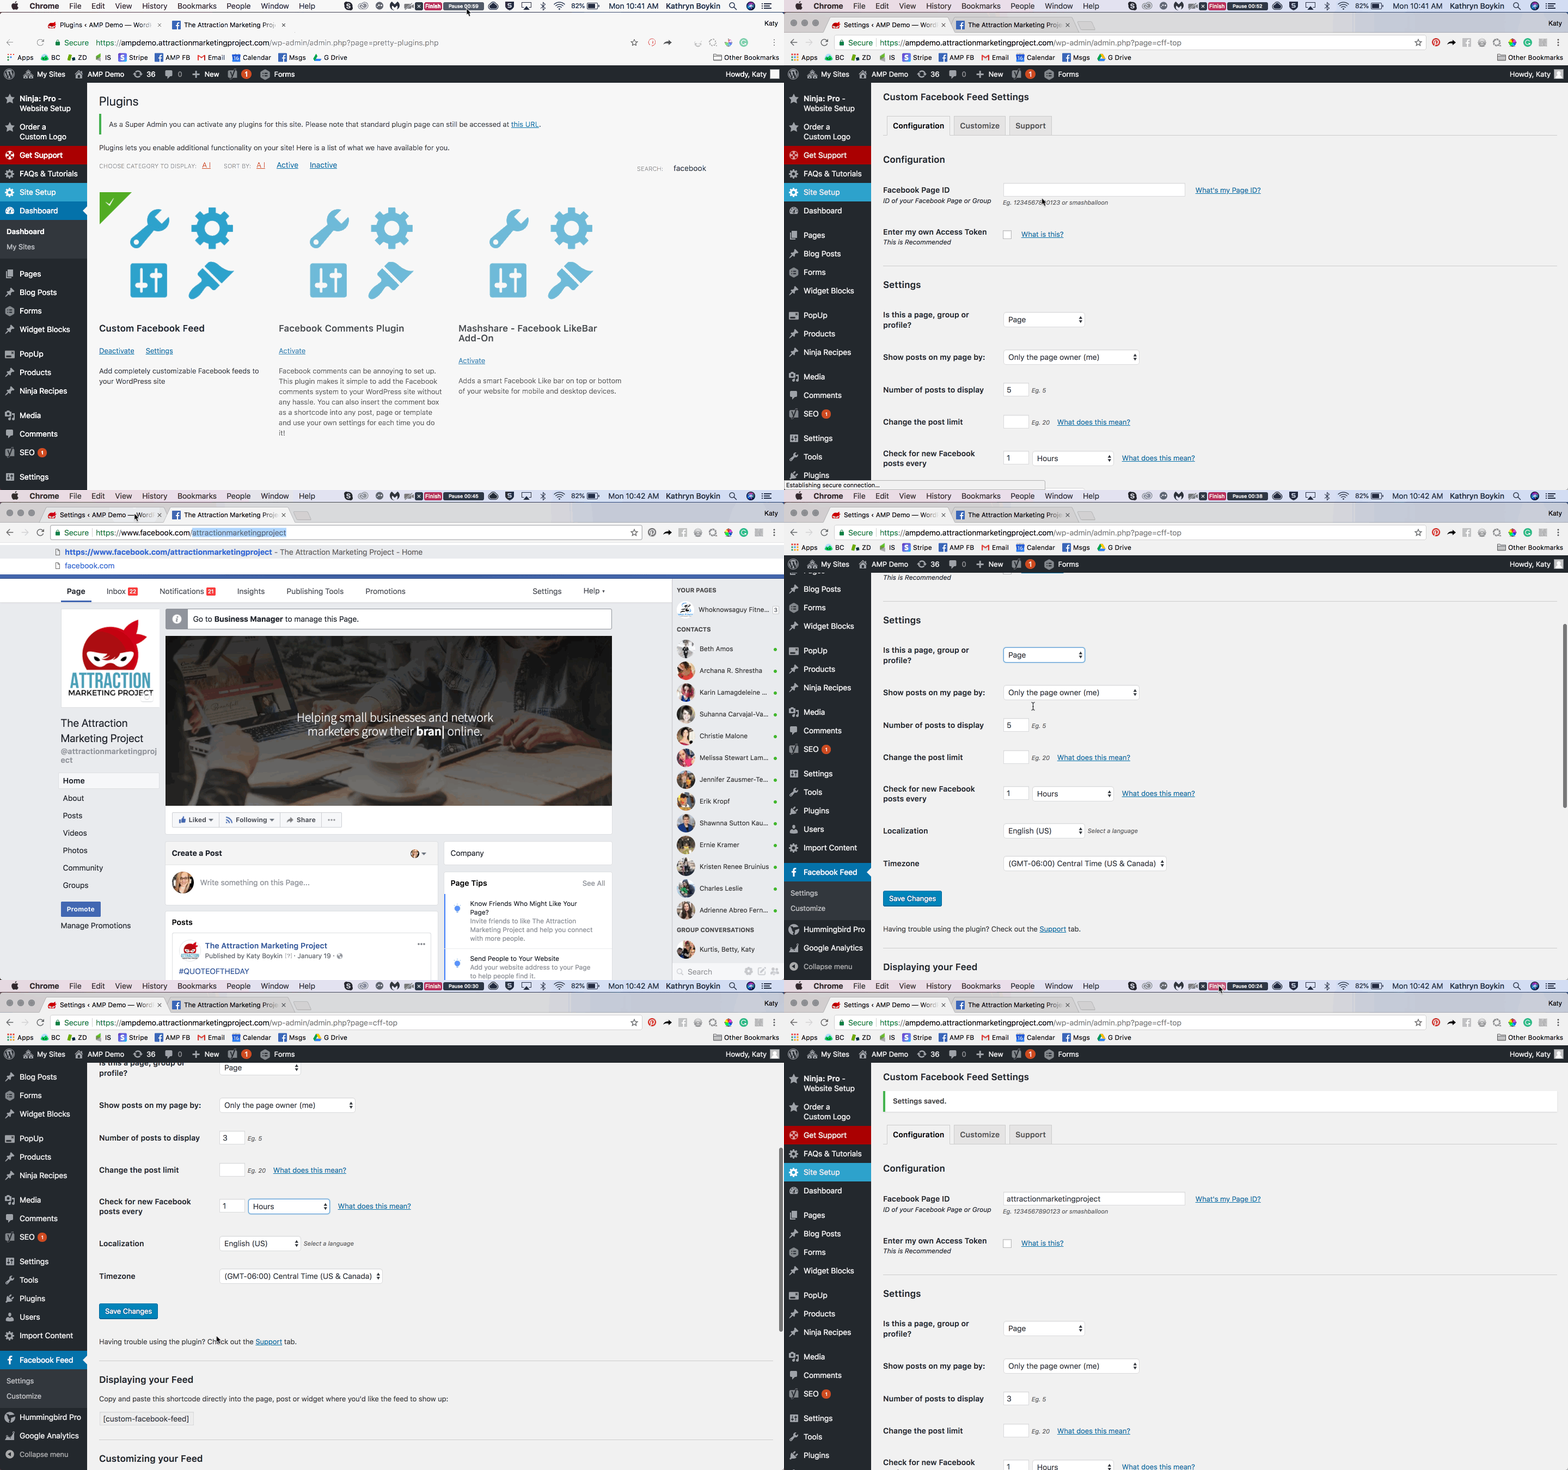
1. From your dashboard, select Plugins from the left-hand menu
2. Type "Facebook" in the search bar.
3. Click Activate on the Custom Facebook Feed plugin.
4. To verify the plugin is activated, you'll find a green check mark on in the corner.

SETUP THE FACEBOOK FEED
5. Once the Custom Facebook Feed plugin is activated, hover over Facebook Feed on the left-hand menu and select Settings.
6. Enter your Facebook Page or Group ID.
NOTE: If your Facebook URL looks like this https://www.facebook.com/your_page_name, you can use your_page_name but, if your Facebook URL like this https://www.facebook.com/pages/your_page_name/1234567890, you need to use 1234567890 as your page ID.
7. Skip the access token field. The plugin will work even if you don’t add your own access token.
8. From the drop-down, select whether you are showing a page, group or profile.
9. Select from the options "show posts on my page by" to show posts only by you, by you and other people or only by other people.
10. Update the number of posts you want to display.
11. Disregard the change post limit setting.
12. Update how often you want the plugin to check for new Facebook updates. The default setting is 1 hour.
13. Modify your language and timezone.
14. Save all settings.

ADD CUSTOM FACEBOOK FEED SHORTCODE TO SIDEBAR
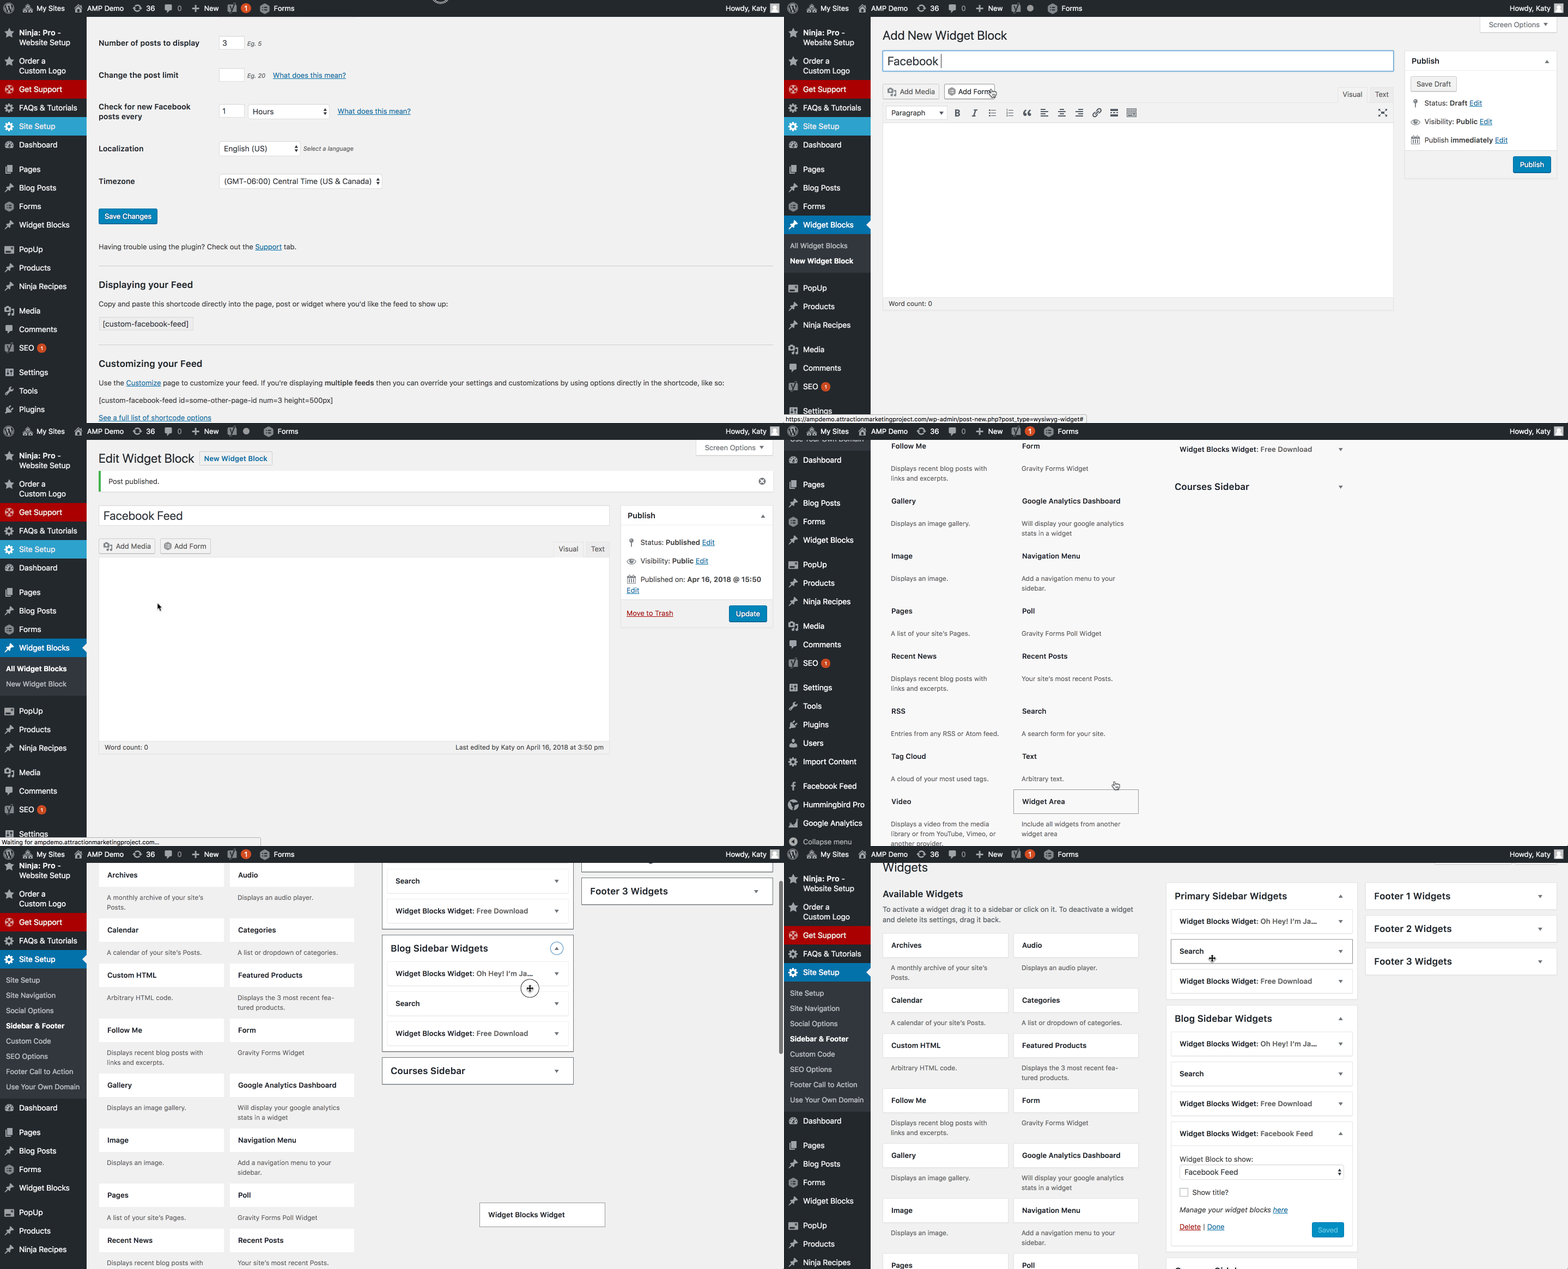
15. Copy the shortcode [custom-facebook-feed] beneath the save settings button.
16. Go to the Widget Blocks > New Widget Block
17. Enter the name of the widget in the title, copy paste the shortcode in the content section, then click publish.
18. To enable the widget, go to Site Setup > Sidebar & Footer
19. Drag and drop a new widget block to your desired sidebar and select Facebook Feed from the drop-down.

20. View your blog or page to see the changes!

